Seni Sulam dan Kreativitas - Panduan Membuat Mozaik dengan Photoshop
Create a Photo Mosaic in Photoshop
DIY Photo Mosaic Photoshop is a popular technique for creating stunning and unique photo collages. It involves arranging multiple images together to create a single image that looks like a mosaic. Photo mosaic portraits are particularly popular, as they allow you to create a detailed and intricate portrait using multiple smaller images.
To create a photo mosaic portrait using Photoshop, you’ll need to start by selecting your primary image. This will be the image that forms the basis of your mosaic. You can then choose a series of smaller images that will be used to create the individual tiles of the mosaic. These images can be anything – from other photos you’ve taken to stock photos you’ve downloaded online.
Once you have your images selected, it’s time to start creating your mosaic. There are a variety of different techniques you can use to create a mosaic picture in Photoshop, but one of the most common involves using the “Create Clipping Mask” feature.
To do this, you’ll need to select your primary image and then add a new layer on top of it. On this new layer, you’ll add the smaller images that you want to use as tiles for your mosaic. You can arrange these tiles in any way you like, but be sure to leave some space between them so that the primary image is still visible.
Next, you’ll need to select all of the smaller images on your new layer and then right-click and choose “Create Clipping Mask.” This will create a mask that only allows the smaller images to be visible in the areas where they overlap with the primary image. You can then adjust the size and position of the smaller images to create the final mosaic portrait.
Regardless of the approach you take, the key to creating a great photo mosaic is to carefully select your images and take the time to arrange them in a way that creates a cohesive and visually appealing final product. With a little bit of patience and practice, you can create stunning photo mosaic images that are sure to impress your friends and family.

Building a Mosaic Image in Photoshop
Photoshop’s layer system was designed for tasks like this. Adjusting the opacity of each layer before applying it to the final image is a must. A transparent image will help you line up the stars at the edges of each panel with each other.
Bring all of your image panels into a single laid photoshop file as layers. You may want to use a reference image of the final framing to use as a base layer at the bottom
You can adjust the opacity of each layer (see below) to 50% to align the stars of each panel up with each other. When all of the layers are properly aligned, you can set each layer back to 100% opacity.
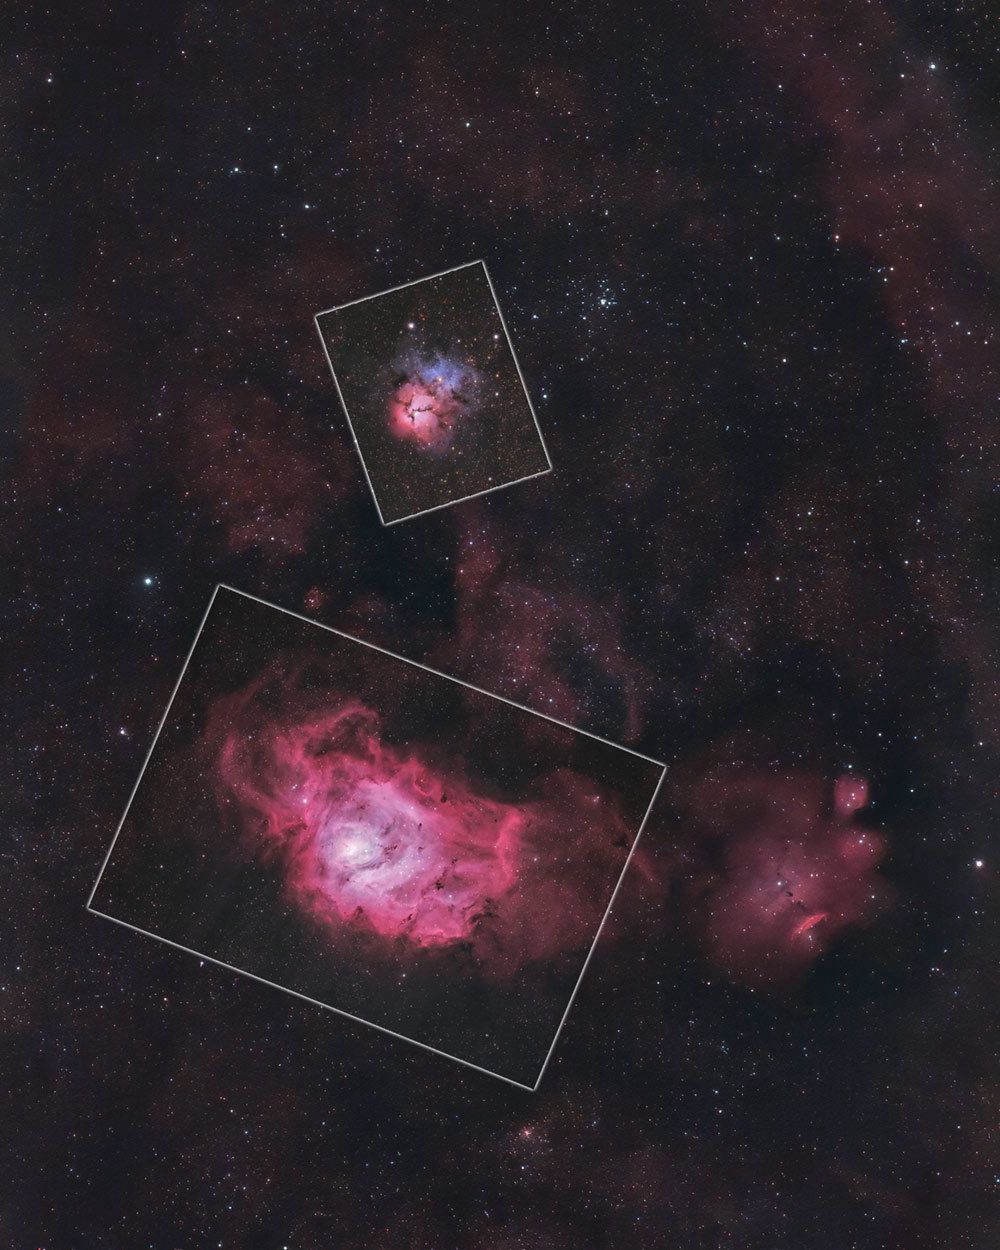
The graphic above shows why capturing a healthy amount of overlap area is important. If there is a gap between image panels, you will need to go back out and photograph the missing areas.
Take advantage of the guidelines tool (View > New Guide Layout) in Photoshop to help align each panel together. In the example above, a full-color, processed image is shown. In reality, this stage should take place before any major processing tasks have taken place.
You may want to perform a simple stretch in PixInsight or Photoshop applied evenly to each panel before aligning the images. A mismatch in processing techniques between panels will result in an odd-looking image.
Tags: shop